How to Highlight Your Hair Safely at Home with Foil
Do you want to highlight your hair at home without totally messing up? Through various dyeing sessions at the salon, you are familiar with the foil technique and how they organize these foils on your hair. That’s how you can take advantage of lightening your color while doing it at home. If you've already made up your mind that you're giving this a try, here is the DIY guide for highlight hair with foil.
Should I Highlight My Hair at Home?
To be honest, we will not recommend you to use chemical power on your hair without advice from a professional. Any lightening power or bleach will cause damage to your strand’s structure leading to dryness and coarseness. When you do highlight wrong, your hair will turn to orange or streak out of your expectations. But nothing can’t stop you from having a trendy hair color, right? That’s why we are here to let you know what you should do before and during the highlighting process.
Things to Care for Highlighting Your Hair At Home With Foil
It will be a challenge for you if this is your first time brightening your hair color. The preparation in advance will allow you to deal with any unexpected situation while dyeing.
Preparing The Foils and Other Dyeing Tools
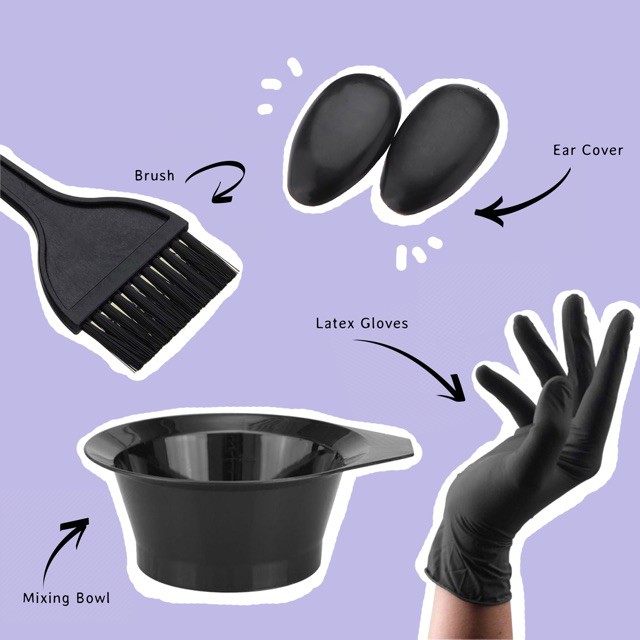
Whether you lighten your hair or dye it into another color, it is necessary to have essential equipment for one highlighting session. Here is the list that you need to invest in for your first dye which can save for another usage.
- Barrettes or clips
- The lightening power
- A hairbrush
- Strips of foil
- Rubber gloves
- A hair tinting brush
These tools are easily found in the supermarket or beauty stores. If some of the items you already have, there is no need for you to purchase more. The alternative is incredibly helpful for your budget.
Besides, while choosing the foil highlight technique, these strips of foil should be cut in a certain size. Based on the length of the applied hair, the size of the foil is different. In general, you can cut the foil into 4 or 5 inches in width and 8–12 inches in length. You can adjust the measurement up to your need. The foil should be long enough to cover your dyed hair so it would be better if the foil has a double-length compared to the highlighted area. In this way, you can fold the foil to wrap your hair. In the case that your hair is too long, you can use two strips of foil to encase your strands
Find Your Lightening Color Kits
The most simple way that most people recently highly recommend while dyeing at home is to opt for a color kit that has full essentials in a package. Some basic tools such as gloves, hair color, and brushes are provided. So instead of buying all of the above stuff, you only need to buy extra items like foil and clips.
In all of the available highlighting kits in the market, the lightener in the package can not get rid of the permanent color. Therefore, for people who dyed their hair by permanent color or gray coverage, these kits can not completely transfer your current hair to a brighter shade.
Besides, the cream of each highlight color kit has a different texture and formula leading to various results after dyeing. Thus, you can commence with the instructions outside the box clearly to achieve the best finish. To begin with, the highlight color kits from trustworthy brands such as Garnier, L'Oreal Paris, and Madison Reed are safe choices.
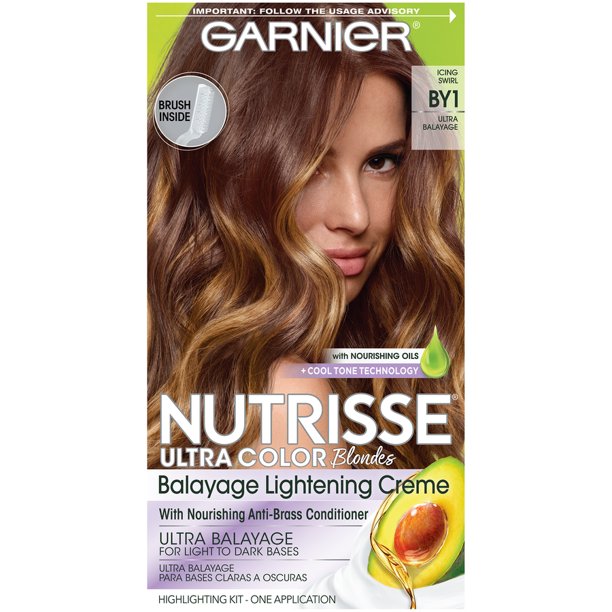
Garnier Nutrisse Ultra Color Balayage Kit
>>Lightening your hair by this item from Walmart, Click here to receive a Walmart discount
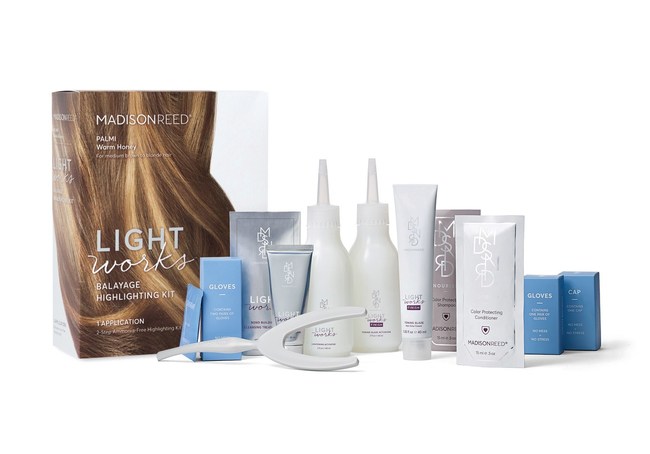
Madison Reed Light Works Balayage Highlighting Kit
>> Buy this item from Ulta to save up to 50%
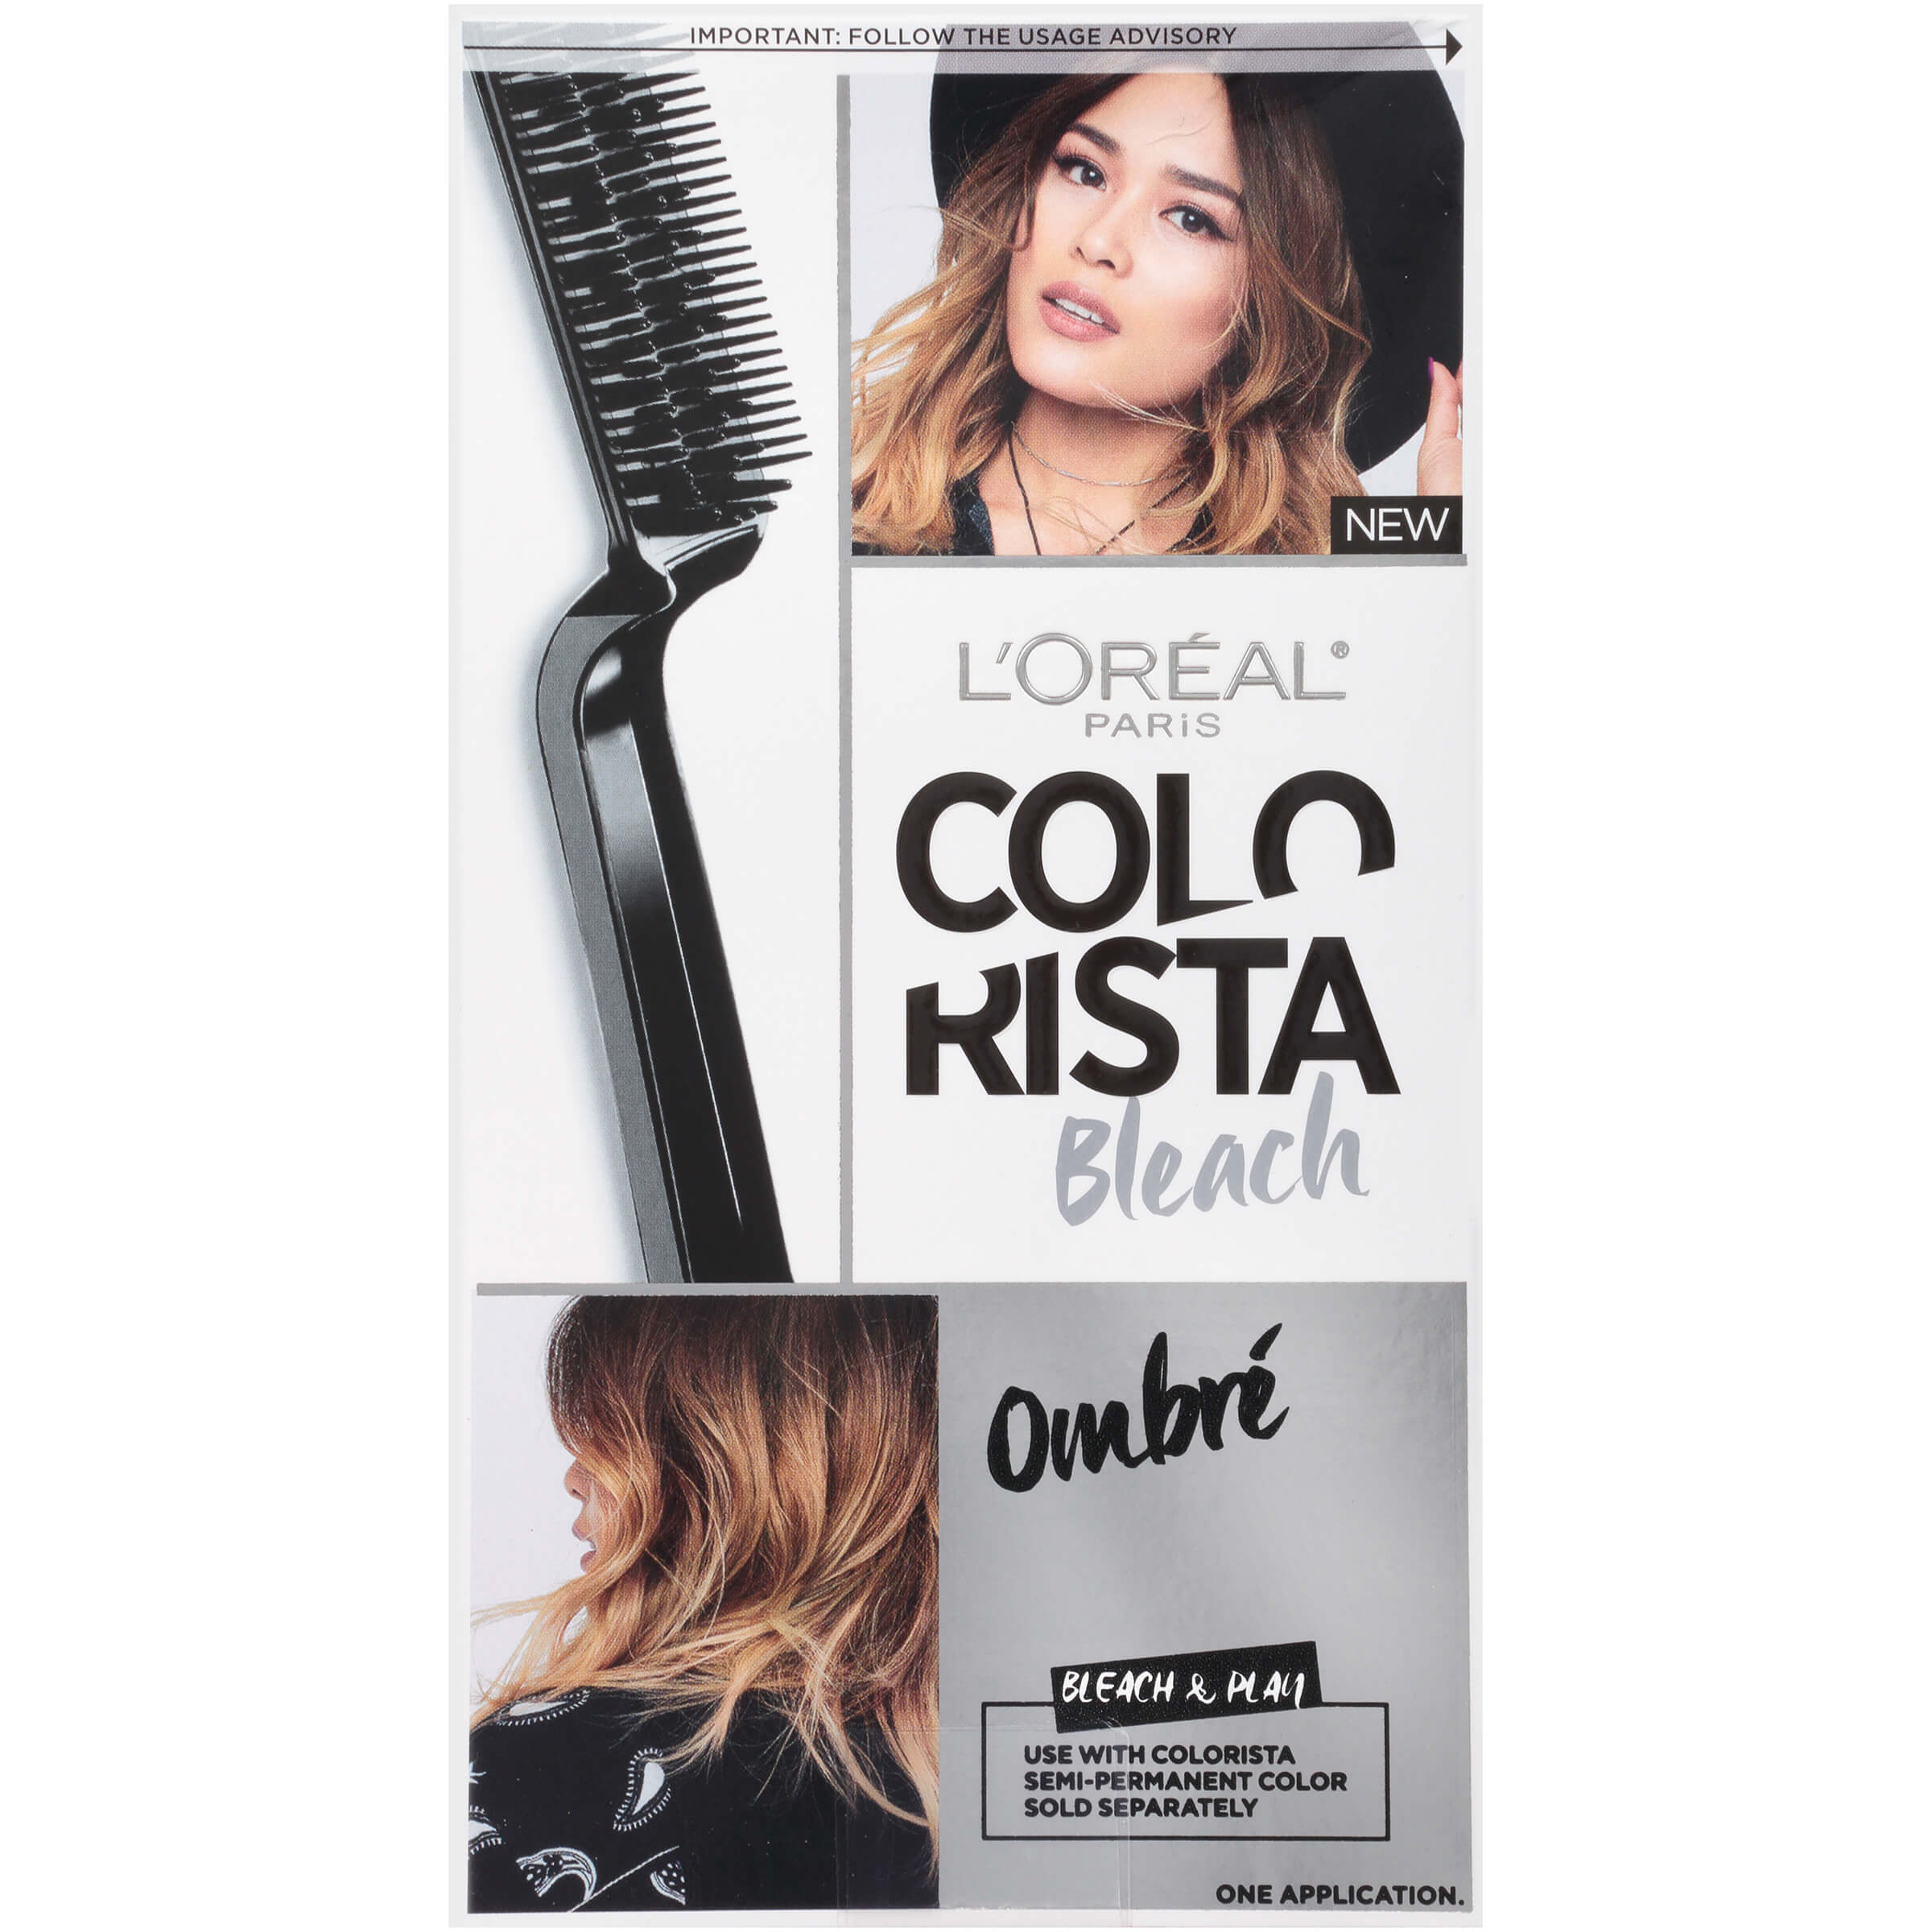
L'Oreal Paris Colorista Bleach Ombre
>> Don't miss a discount of 30% when buying this item from Target
Tip: There are a lot of other kits that you can opt for your dye but these highlights can not lift your hair color up to two levels. So we suggest you notice the kits that are designed for your base color. For example, if your hair tone is brown, you can pick a kit featured for lighter brown hair results.
Here are some amazing deals on lightening color kits:

Up To 30% OFF On Select Sale Items

ETAE Products Coupons, Promo Codes & Sales
$10 OFF Your Orders
TRESemmé Damage Protect Shampoo For $3.99

Get $15 Credit When You Refer Friends
Between Washes Volumizing Dry Shampoo From $5.49

Up To 20% OFF Hair Care Products
Products as low as $1
RESemmé Flawless Curls Curl Defining Hair Gel For $6.49
Hair Vitamins From Only $12.5
How to Highlight Your Hair Safely at Home with Foil
Coloring hair highlights with foil is the traditional way used by many professional hairstylists which can be easily done at home. The strips of aluminum foils wrap dyed hair and keep the heat that can help the hair get color faster. Besides, these also minimize the situation that the dye is spread to the surrounding hair, thus giving you very precise highlights.
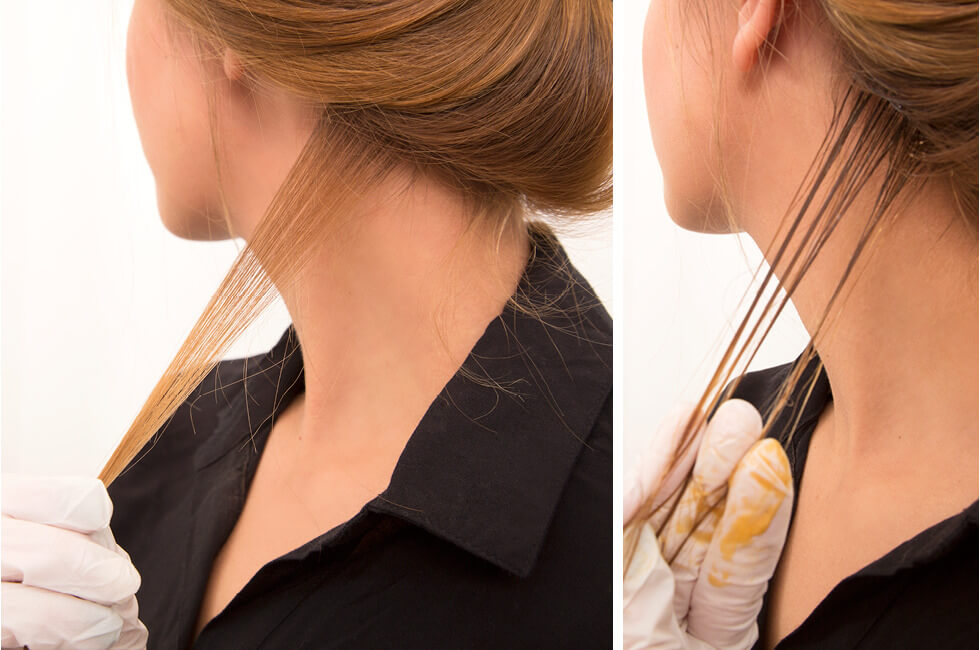
Testing the Reaction of Strands with the Hair Color
Before diving your hair into lightening power, you are advised to take a test to your strand. Dye the highlight into a small part of the hair, then leave it for about 10-15 minutes. If your hair is too damaged, the highlighting power will cause the break to your strand leading to hair loss. This means you are not ready for highlighting. For other people who do the test and have a normal result of yellow or pale yellow, your hair reacts perfectly for the highlight. Typically, light hair lifts faster and dark hair lifts slower.
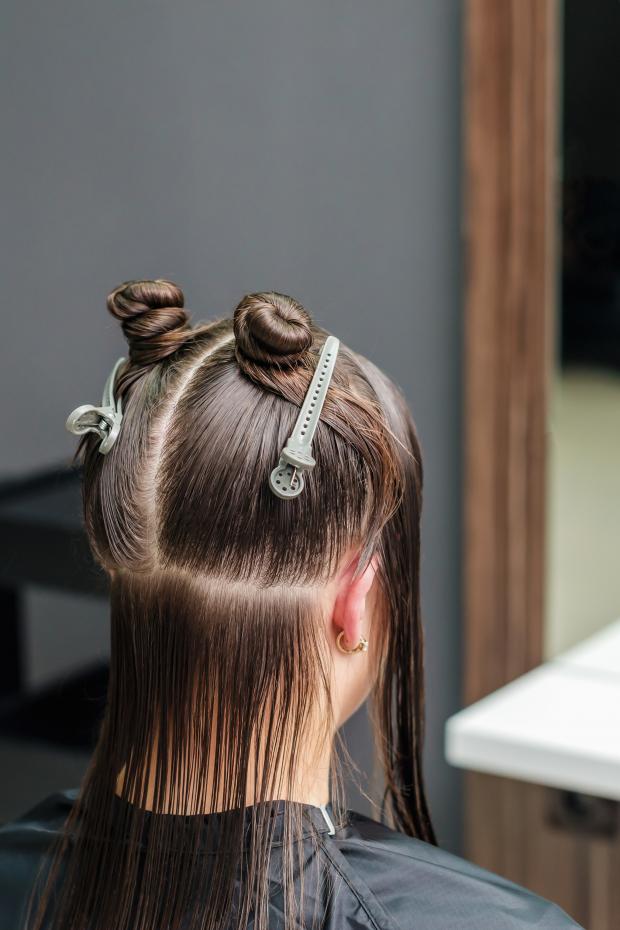
Section Your Hair
Dividing the hair that you want to highlight into three total sections two sides and one backside with barrettes or clips. You can section your hair into smaller bundles depending on your hair’s length and volume. This step will help you control the amount of cream applied on each part and limit the spread of highlights to the surrounding hair.
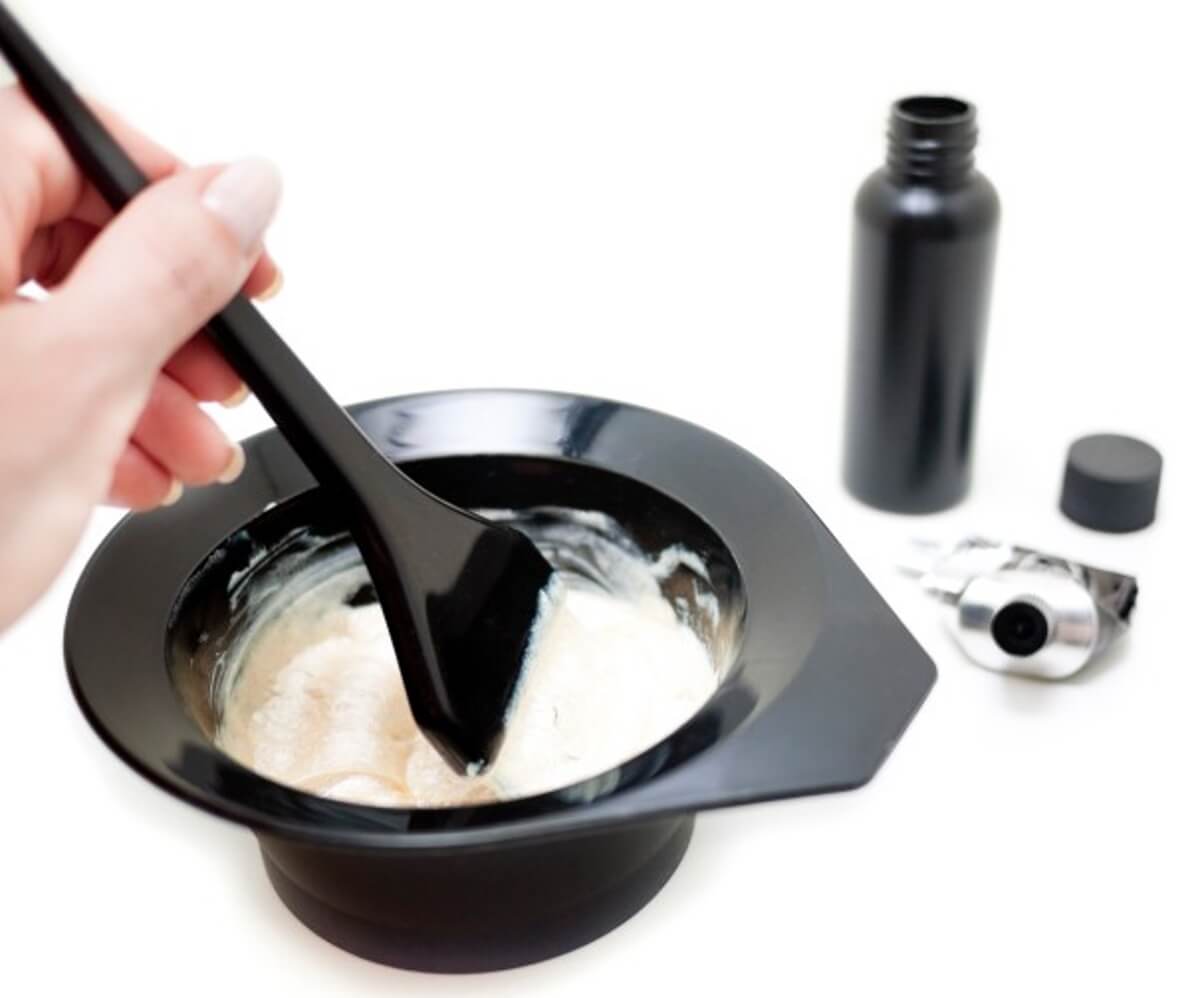
Mixing the Highlight Formula
If you buy lightener and developer separately, you will need to follow the instructions to mix a perfect texture. Normally, the retailer will sell the 30 vol developer to you. There is no exact formula for highlight cream and developer but you can use the common ratio of hair color of 1:1. That means when you put one part of the lighter, 1 part of the developer should be mixed. It is more simple when you buy a highlight kit. The instruction of the retailer is a detailed guide that you can kick things off.
Select Hair to Dye
Select the parts you are dyeing by using the end of the tail comb. Do it as a professional by weaving the end of a tail comb through the hair and separate the selected lock. For better penetration, your hair should be grabbed as small as possible. The highlight cream can not propel evenly to a large chunk of hairs. You can start with the hair from two sides first and then go forward to the top.
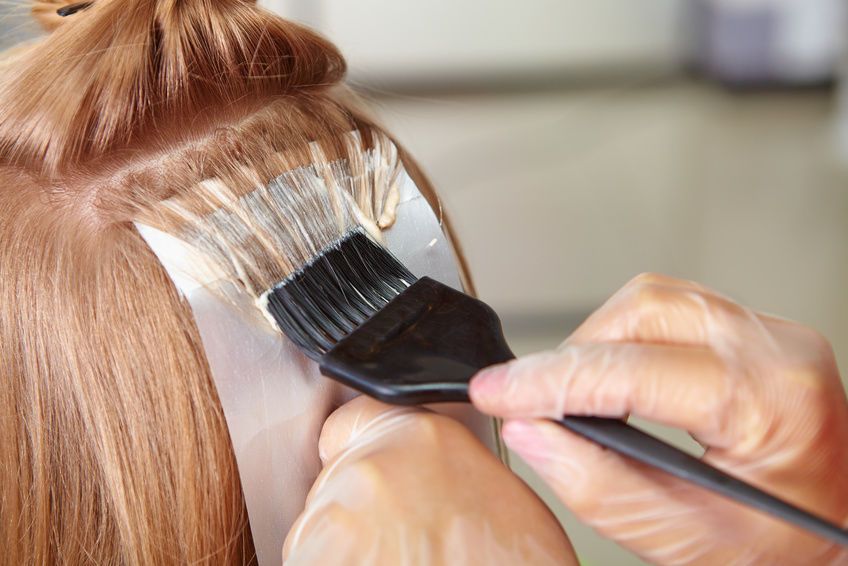
Highlight Hair with the Foil
Appling your foil underneath the selected hair ( which you have done in step 3) and spread the highlight on it with your hairbrush. The silver side is preferred to face up even though you can use both sides of foil. Make sure that the strip of foil is large enough to cover your applied hair. Then keep foil and hair in the process of applying hair colorant until your hair is stuck on the strip.
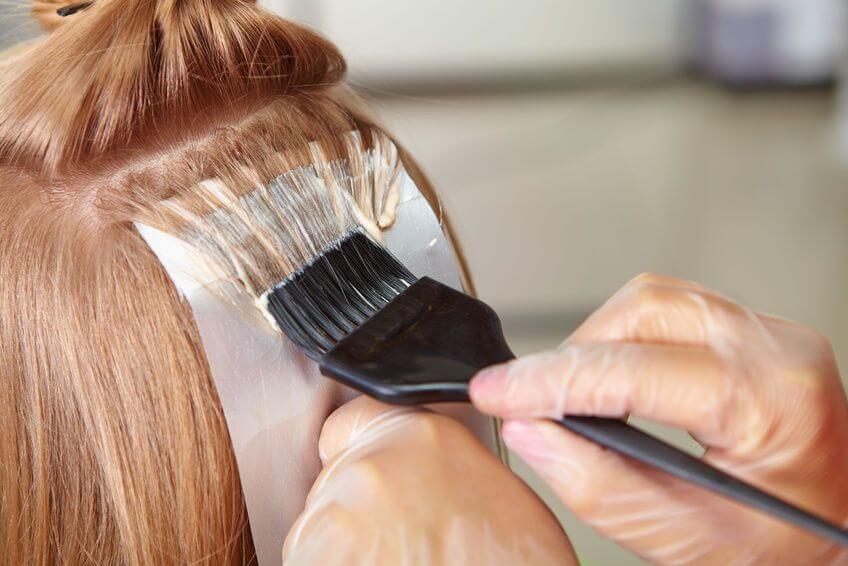
You can continuously coat more dye and use the foil as a canvas. When you finish, you can wrap it from the end and fold it up and over so that the hair is entirely encased in an envelope of foil. The color will be bled out if you push too much strength while covering your hair with foil. The final one is to place it in a certain area by a sectioning clip. With other locks, you will do the same thing until all the hair you tend to dye is completely covered by foil.
Wash Hair
If you have done all of these steps, congratulations! After letting dyed hair sit for a certain time, we will need to wash the chemicals out of the hair. Because the lightening process will cause damage to strands so it is needed to use a conditioner for your colored hair. Avoid using normal shampoo and conditioner within 24 hours to 48 hours to make the color soak into the hair.
How to Determine the amount of hair for each foil
There is no method to define the exact volume of hair for each strip of foil. We recommend you section your hair to as small as possible. This will allow every strand to absorb the color easily. Let's take a look at this video to have a full view of the highlighting process.
Hair highlighting at home is a complicated process if this is your first time. You will need to practice multiple times to be an expert. It is normal when you make a mistake during highlighting your hair at home with the foil but make sure that you follow all of the mentioned steps in this article to achieve the best result.